
Spooky cobweb basement
The conversation when people come to see our house for the first time often goes something like this: “This house is so beautiful….but it must cost a fortune to heat.” Last winter was so mild, our bills never got above $450 or so a month in the winter, but since our summer bills are around $20, I figured that all worked out OK. We keep the heat at about 63 degrees, and it seemed to work OK.
Then I didn’t get the windows fixed this summer like I’d hoped to (not sure where I got the idea that I’d get so much done with the kids home from school). With this winter predicted to be much colder, I met with David Sweet of Bygone Era Consulting to talk about making the heating system more efficient. We have single pipe steam, which is a bit of a lost art. Our system gave nice heat, but it was uneven and was often noisy, and once we got the MidAmerican bill for December and the first week of January, we knew things had to change before our current cold snap.
David checked all the radiators for proper sizing, and fortunately only found one that wasn’t properly sized for the square footage of the room vs. the square footage of the windows. The bad news was, the one problem he found was an undersized radiator on the second floor. So at some point, if we want that room to heat properly, we will have to carry a 500+ pound radiator up the stairs. Sounds like oodles of fun to me. We decided to start with the cheap and easy fixes, and leave the space heaters upstairs for a while longer. Cheap meant about $500 for materials. Easy meant it was something Doug was willing to do.
Step one was insulating the steam pipes in the basement. Our basement was always very warm, with exposed steam pipes everywhere, but leaving the door open to the basement only brought so much heat to our living spaces. We used unfaced insulation and wrapped it around the pipes using heating duct tape. (This isn’t the same thing as plastic duct tape that you can use for every other McGyver thing you do, this is silver tape that’s basically metal with adhesive. It costs about $12 for a large roll). Doug spent the weekend wrapping the pipes that were easy to reach, and the difference was immediate and dramatic.
 With the pipes wrapped from the boiler to the crawlspace, we suddenly were getting steam upstairs in rooms we’d never gotten heat in the past. Alas, along with it came terrible knocking, banging, and then an ominous gurgling sound. That was Sunday, and I resolved to call David Monday morning.
I wasted no time with that plan, since we woke up to no heat on Monday at 7 AM. David came over, and we figured out that all that steam was teaming up with our quick vents, and causing a massive build up of condensate, which had flooded our single pipe system and left us with steam radiators full of water and unable to take on steam. We quickly purchased Hoffman 40 slow vents for all the radiators, and the result is a quiet, even heat throughout the house. Bliss!! All that remained was insulating the creepy crawly crawlspace.
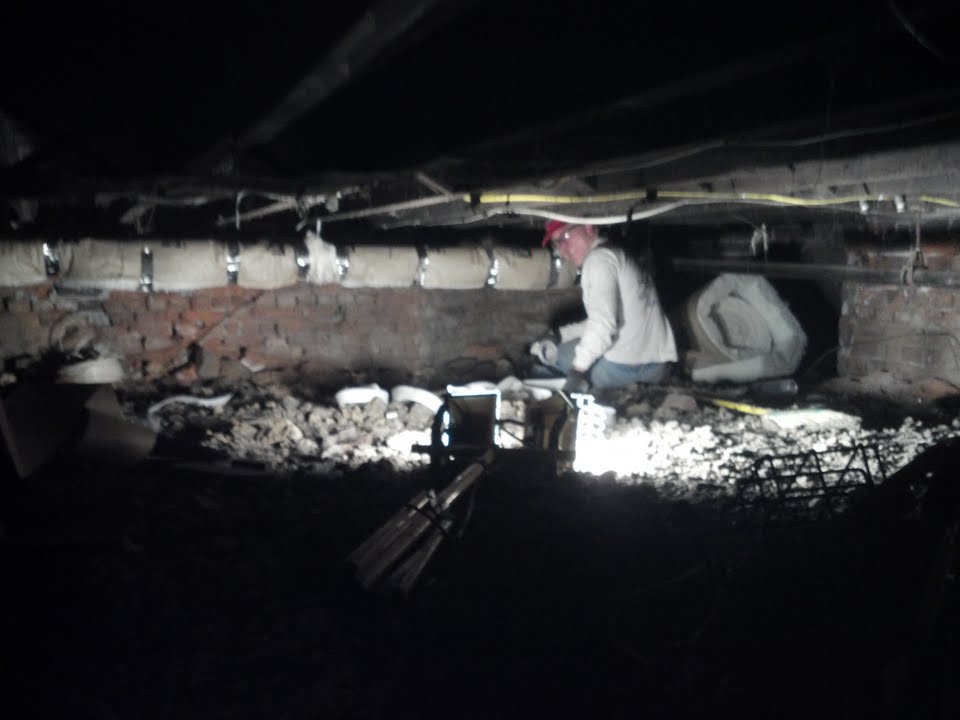 Doug took on that task this weekend, and completed the wrapping. You’ll notice that he left the paper on the pipes in the crawlspace, which you can do if the paper doesn’t touch the pipes. Now the second floor is toasty, but the first floor, which was once radiant heated through the floor (unintentionally, by way of our warm basement) is now the cooler floor. The plan now is to look at adding insulation to the floor between the first floor and basement, but for now, we’re happy to report that we can generate as much steam as we need with the PSI set about 60% lower than it was, which should result in dramatically lower energy bills without giving up the steam heat we love.
Soundtrack of the weekend goes to the Beastie Boys, with “Crawlspace.” Had it in my head all weekend.

 We’re starting to get into all those projects we’ve been talking about doing since we moved into the house. in our walk through while considering the house, we commented that while the kitchen was huge, it only had about 3 linear feet of counter space. The Realtor said that she really didn’t understand why the seller had run the cabinets all the way down, but they had run the granite all the way to the wall, so we could always raise the cabinets if we wanted more space. In the six months we lived in the house before closing, we’d purchased a temporary center island from Ikea, and then customized it to fit our decor, but we still didn’t have much counter for big entertaining, and we were really short on counter with electrical outlet access.

 As referenced in our
 Our chickens are laying about 9-11 eggs per day now, so to even come close to eating them, I’m interviewing egg recipes left and right. One of my favorites was