Hatton House Diaries

One day, we decided to buy a 125 year old Victorian House in Des Moines, Iowa…….

Baby Room Update May 7, 2016

Filed under: Remodeling and Design Projects — hattonhousedsm @ 10:51 am

image

Our “new” baby just turned one, so I’ve been making a push to finish the nursery. I used a Natart crib that I saved (clung to?) from my store, just waiting for this baby. I made the curtains from Alexander Henry fabric I found at my favorite place to shop while visiting my parents, The Fabric Corner in Arlington, Massachusetts. I even hand sewed the lining (a story for another day).

I met Brice McCasland at the Des Moines Art Festival and bought one of his paintings. He ran an auction on his Facebook page and I won this perfect painting for the baby’s room. I love starting her off with fine art. More photos to come as the room gets closer to finished.

image


Windows Restoration and Refinishing Update March 11, 2016

wp-1457727516370.jpgLast Fall, we got a stretch of warm weather that allowed us to kick start our windows project. This is an ongoing project, given the house has roughly 50 windows all in some state of disrepair. The warm spell allowed me to complete the finishes on the windows in the kitchen addition. These seven windows were new construction, but were never painted or stained when the previous owner installed them. This is still our “work room,” so excuse the mess, but the trim turned out great, if I do say so myself.


wp-1457577037300.jpg
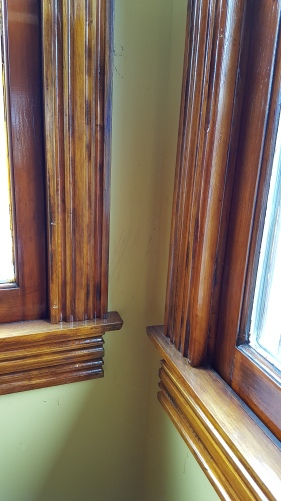
We used new wood because it seemed silly to spend on historic/old growth on a room that’s new construction. Just the same, we wanted the look to flow with the rest of the house. I used a combination of General Finishes gel stain and shellac and was able to add some pretty nice depth and color to builder basic wood. These boards are 1×4 that were routered to mimic the larger trim in the rest of the house.


wp-1457727655108.jpg
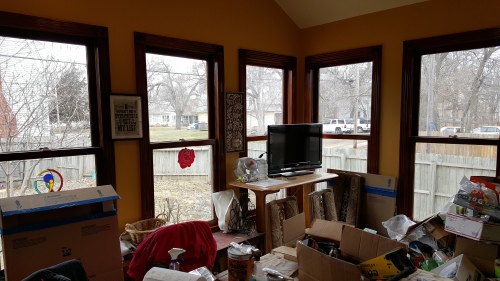
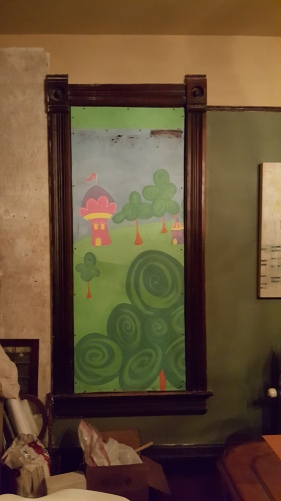
While I worked on these windows, my engineer husband worked out a frame that we could insert in our historic windows behind the storms so we could continue working on windows through the winter, new baby permitting. He used a mural panel from one of my previous projects, so we had a lovely cartoon view for the in-progress windows.


wp-1457727638454.jpg


In addition to refinishing, our historic windows get new glazing, new glass where required, new ropes, and weatherstripping. We’re excited to watch our heating bills plummet with each redone window.


Stained Glass Project Complete!

wp-1457577085643.jpg
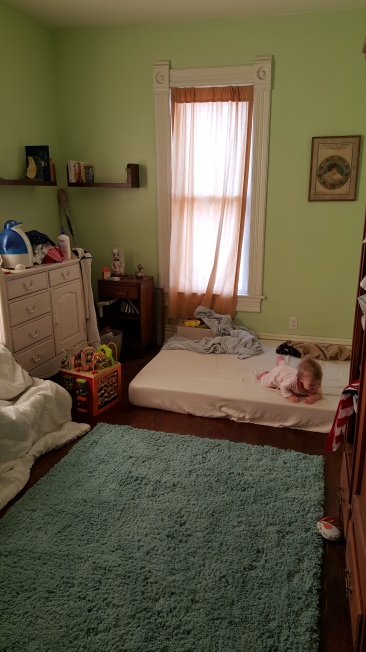
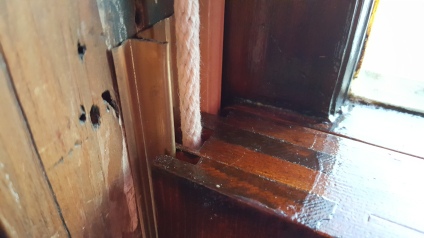
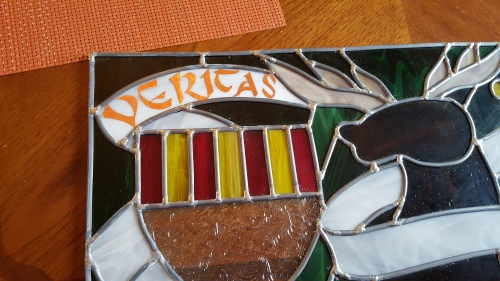
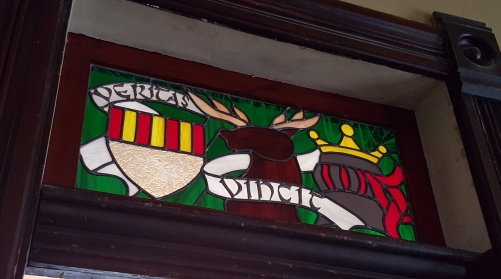
Back in 2014, I took a class at the Des Moines Art Center in stained glass, which resulted in a transom window that was almost perfect. I adapted the design of the Keith family crest to a horizontal design, and I only needed to sort out how to add the family motto “Veritas Vincit” (truth conquers). I thought about casting metal letters, buying letters that could be soldered on, or foiling letters, but before I could execute a decision, I found out I was pregnant and didn’t want to be anywhere near lead.

Flash forward to this winter, new baby on hip and struggling to move house projects forward. My new policy is to make decisions and complete projects. Pregnancy brain made it impossible for me to think straight, so I orphaned projects left and right for lacking of trigger pulling abilities. After a brief Facebook discussion, I decided to try cutting letters out of foil, allowing me to control the font, then soldering on top of the foil to give the letters depth.

wp-1457726006194.jpg

I made paper drafts to get the letters spaced into the glass.

wp-1457726027207.jpg

Cut the letters out of copper foil and stuck them to the glass. Then I carefully soldered over the foil (not sure why I had to get my heart set on letters with so many sharp points, but I did).

wp-1457726121675.jpg


Here’s the completed project. I love how it looks, even if it is a finished transom window in an unfinished door frame. The frame is a project for another day. I’m calling this one done.


The New Tiny Person March 10, 2016

Filed under: Remodeling and Design Projects — hattonhousedsm @ 3:11 pm

wp-1457727718273.jpg
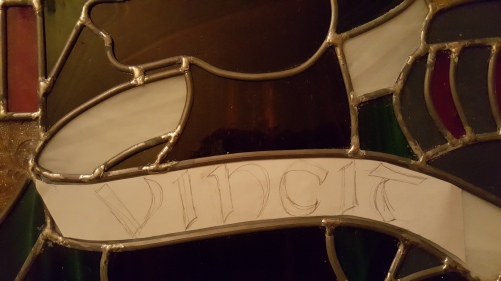
We bought the Hatton House specifically because it had four bedrooms, in the hopes that it would one day house a family of five. We’d just about given up hope when we found out our third kid was due in April of 2015. So sorry for the lack of recent updates, but we had a good excuse.

In my life before the Hatton House, I designed children’s rooms and painted murals for children. Like the cobbler’s shoeless kids, our baby is almost one and her room is just starting to come together. Hopefully, you can look forward to more consistent posts of house projects, included one about the completed nursery, but for now, here’s our new future rehabber in her native environment.


Window Restoration aka 70° November Days Are Insane November 4, 2015

image

I could have worked on windows all summer long, but why would I do that when I had all the time in the world? I was caring for a new baby so I guess I have some excuse this year.

Our third child turned six months old just as the weather turned cooler. I suddenly thought I needed to rush to make up for all of the time I lost in restoring our windows. It started with finishing the windows that I had pulled a year ago, just before finding out that I was pregnant. Then I started pulling windows from our addition, a space that had new construction wood windows that had never been finished by the previous owner. Now it seems like I’m in a never ending friends eat to beat the clock and the following temperature is to finish every window in the house ( which of course is not going to happen before winter).

I’ll try to post photos of my process work when I have a little more time but for now I’m happy to be back full steam in the neverending restoration.


If You Give a Rehabber Glazing Compound October 17, 2015

Filed under: Remodeling and Design Projects — hattonhousedsm @ 4:11 pm
Tags: , , ,

image

Our front window has been broken for about a year. We had to special order glass, and by the time it came in it was too cold to install it. Then in April, our baby girl arrived and all work ceased. Just recently, Doug took out the broken glass and, although it took two weeks to get the stained glass store hours right (closed on Sunday AND Saturday after 4), finally installed the glass. One less project that should have been done last Fall finally complete! On to the next one, right?

Wrong. While he had glazing compound out, he thought he’d look at our other windows. Like this one, a roughly 4×4′ window in the front parlor.

image

Look closely. See those white spots in the glazing? Yeah. That. That’s where all the glazing points have popped out. This giant plate of glass was held in by exactly 3 points, two of which were in the bottom. So now that project has been upgraded to the extremely urgent list.

Realistically, every window in this house needs to be reglazed, weather stripped, and/or completely redone. Particularly the ones I already pulled last August, the week before I found out I was pregnant, followed by three months of sleeping roughly 20 hours a day. Wish me luck with a warm Fall.


Ease Your Panes – Window Restoration Class Comes to Des Moines April 2, 2014

windowworkshopHatton House is hosting a window restoration class for the Des Moines Rehabbers Club. I’ve wanted to take a class like this since we bought this house, and after a year of planning, it’s finally coming to fruition right in my backyard…er…middle parlor! The class will be taught by David Wadsworth of Decorah, Iowa, and will be a hands on workshop where people will have the chance to work on donated windows and learn the ins and outs of window restoration.

Why did I want this class? Original restored windows with storms have a higher R value than replacement windows, but the cost of hiring someone to restore them would be cost prohibitive for us. $500-700 per window is unrealistic for a house/budget like ours. Learning to restore windows for roughly $40 in materials per window would be pretty easy to recoup a return on investment (especially in a house as drafty as ours!)

There are a few spots left at the class this Spring, so sign up today. Here’s the link: http://renovatedsm.org/class-announcement-restoring-wood-windows-with-david-wadsworth/ See you in a few weeks!


Stained Glass Class at the Des Moines Art Center March 8, 2014

Filed under: Hatton House Studios,Remodeling and Design Projects — hattonhousedsm @ 11:31 am

wpid-20140308_103026.jpgI took the stained glass class at the Des Moines Art Center about 15 years ago, before we had kids, before we had an historic home. I mostly paid attention to the stained glass technique called “foiling” which is better suited for small projects, as opposed to leaded glass, which is better for larger windows like I want to do in the Hatton House. So when my parents asked what I wanted for my birthday/Hanukkah, the answer was easy: Stained Glass Class!

Turns out, it’s the same teacher still teaching at the Art Center, Jerry Goodrich, who was very supportive in my crazy idea to do a 12×27″ transom window in the scope of a six week class, especially after over a decade break in glass work. I free-hand drew an adaptation of the Keith family crest, altering it from the typical vertical to horizontal. The glass cutting and grinding came back fast enough, but this was my first project in lead, the that was more tricky than I bargained for. After much cursing and one last minute broken piece, it came together nicely. I still need to cement it, and I haven’t decided if I’m going to add the family motto “Veritas Vincit” in the white banner, but here’s the first of six transoms I want to do in the house!


Researching Your Home’s History & Abstract Party

Filed under: Remodeling and Design Projects — hattonhousedsm @ 10:39 am

We’ve been very busy working on stained glass and a window restoration event for this Spring and have neglected the blog. My apologies! More updates coming soon, but you should join us at today’s Des Moines Rehabber’s Club event “Researching Your Home’s History & Abstract Party.” Their facebook event is here:

https://www.facebook.com/events/267692790061492/

See you there!


The Front Door Finishing December 13, 2013

The doors, after sanding to even out the finish, no shellac yet.

The doors, after sanding to even out the finish, no shellac yet.

When we bought the Hatton House, there was a gorgeous door already in place, however it was painted on the exterior, but in a horrifying state of unfinished on the interior. Someone had stained the door with a single layer of stain, but they’d done in haphazardly, so that parts of the door had no stain at all, and parts of the door had stain pooled into corners and left to permanently damage the color of the wood. I stared at this door for two years, trying to sort out how I was going to attack it. I have tried to avoid using heavy duty strippers, and I couldn’t sand away the spots where stain had collected. I decided to try to finesse the coloring in the wood in combination with removing the dark spots where I could.

I started with a light sanding of 200 grit paper to take the dirt and hopefully even out some of the variation in color from the stain job. It didn’t take out all the color variation, especially in the window muntin corners, but it helped, and I hoped would be enough once I blended it with the shellac. Several people I’ve talked to use colorants in their shellac, but I opted for pure shellac and a stain coat from General Finishes Gel Stain in color Java.

This is what we were up against: stain on the face of the muntins, but not the sides, except where it pooled to almost black in the corners.

This is what we were up against: stain on the face of the muntins, but not the sides, except where it pooled to almost black in the corners.

I coated the doors with a thin coat of shellac, followed by a coat of stain in areas that needed to be darkened. It was a bit tricky, feathering in the stain over the areas that got too dark in the previous owner’s coating. Each coat took about 90-120 minutes per door, as it took so much time to coat all the surfaces around the window panes without completely trashing the stained glass. Once I was happy that the color was as balanced as it could be, I alternated coats of shellac with extra fine steel wool until I’d built up a nice sheen. I think there were three cycles of shellac by the end of it.

The end result is pretty great. I love how the shellac pulls out the grain in the wood, and I think the variations in stain are to the point where they look like aging more than mistakes (that’s what I’ll tell myself at least). I used denatured alcohol to lift some of the wax from the trim around the door, and I’m pretty confident that with a little work in the spring, the trim can be brought to look just as great as the door does. Stay tuned….now that I’m getting more confident with wood working projects, it may be time to tear into the endless supply of those projects.

The finished product. Completed doors that look amazing (but don't photograph well) in the daylight.

The finished product. Completed doors that look amazing (but don’t photograph well) in the daylight.